Thursday, July 19, 2012

Tribal Print Envelope Clutch

I've had about a yard and a half of leftover suede fabric sitting around for years now and haven't done anything with it.  I decided to make a tribal inspired clutch.  It came out really cute, but I still have a ton of fabric leftover so if anyone has any suggestions of what I should make with it I'd love to hear them.  If you want to make your own here are the instructions - You can use any fabric you want - 1/4 of a yard is more than enough!

Materials
- 1/4 yard of your outer fabric (I used faux suede)
-1/4 yard liner fabric (I used lacey fabric, but you can use anything)
-a piece of cardboard a little smaller than you want the clutch to be

Instructions
Start by making the pattern.  This one is really simple - it's basically a house shape.  Make sure the triangle part is half the height of the rectangle part and that the point of the triangle is centered and you're good.  You can make it any size you want.  You will use this pattern to cut out your outer fabric and the liner fabric. Cut out your cardboard a little smaller than half of the rectangle part.  (I cut mine about 10.5 x 4.5)
  
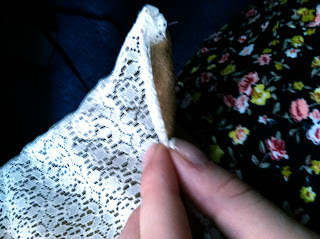
Next, we're going to sew the liner to the outer fabric.  Pin the liner and the outer fabric together right sides together and sew around the perimeter leaving the bottom open. Turn it right side out and insert your cardboard into the bottom opening and push it up to the top half of the rectangle part.
Now you need to sew the bottom shut.  I just folded the raw edges under and top-stitched it.
This is the final sewing step - you're almost done! Fold the rectangle part in half with the lining on the outside.  Sew up the sides and turn it right side out.  You can stop here, but if you want to decorate it with a tribal print keep reading. 
I used acrylic paint to paint on this and it worked great. I used a brown color and it looks nice but subtle.  I would have liked to experiment with more colors but I was afraid it would come out weird.  I would definitely suggest using more color though - google tribal colors and use colors you find online!

I freehanded this but I uploaded a pattern you can print out if you want to make a stencil! You can also look up your own pattern, or paint anything you want on it.  I know the acrylic works on suede, but if you're using another fabric test it out on a scrap piece first to make sure it doesn't bleed too much.

Your clutch is complete!  I think it's perfect for a night out! I can't wait to use mine!


Sunday, July 15, 2012

Easy DIY Romper!

Rompers might be my favorite thing to wear in the summer, but being 5'10" I found it hard to find a romper that was long enough for me.  So I thought, why not sew one? It seemed easy - basically shorts attached to a tube top!

And I was right - I had no trouble throwing together this adorable romper.  It probably only took me about a half hour to complete.  Here's what you need to make your own:

Materials:

1 yard of a lightweight fabric (depending on your size you might need more or less)
1.5 yards of 3/4 inch elastic

Instructions:

Let's start with creating the pattern for the shorts.  To figure out how to make your shorts pattern, measure around the biggest part of your waist and add about 5 inches.  A typical pair of shorts is constructed from 4 pieces - two back pieces and two front pieces. To figure out how wide to make each piece, take the measurement you took earlier and divide by 4.  The pattern below is based on my measurements (35 inch waist + 5 inches / 4 = 10 inches across).

Create a pattern similar to the one above on a piece of tissue paper, wrapping paper or butcher block paper.  Trace and cut your pattern onto your fabric, allowing about 1/4 inch for seam allowances.  You will need two back pieces and two front pieces, but make sure you flip your pattern over when tracing the second piece.   

Lay the two back pieces on top of each other right sides together.  Sew along the curved line.  Do the same for the front pieces.  You should now have two pieces that semi-resemble shorts. 
 
Lay the two pieces on top of each other right sides together.  Sew up the straight sides then stitch along the crotch curve.

You are now starting to have something that resembles shorts!  The next step is to make a casing for the elastic.  Fold down about an inch around the top of the shorts and sew around the bottom of that to make the casing.  Make sure you leave a space to insert the elastic.

Now measure your waist and subtract a few inches - that's how much elastic you need.  Secure a safety pin to the end of your elastic and feed it through the casing until you get to the end.  Sew both ends of the elastic together and then sew the casing shut.  Turn the shorts inside out and try them on to make sure they fit.  Hem the bottom of the shorts to your desired length. (If you need help with hemming, click here for directions!)

Congratulations! You're halfway done!


Now it's time to work on the top piece.  It's important that the top be the same width around as the shorts so that you can sew them together.  So whatever measurement you found for your waist in the beginning plus 5 inches, divide that by two to get the width for each of the two pieces (front and back) of the top.

Measure the length from underneath your armpit to your hip.  Add about half an inch for seam allowances.  This will be the length of your top.  Cut out two rectangular pieces of these dimensions.
Lay the pieces on top of each other, right sides together and sew up the sides.  Then, fold over about an inch over the top and create a casing just like we did for the shorts. Remember to leave space to insert the elastic!  Measure around your bust and subtract a few inches to get the length for the elastic.  Feed the elastic through the casing and sew the ends together just like we did for the shorts.

Now we just need to sew the two pieces together.  This part is a little tricky!  Turn the shorts right side out and insert them into the bottom of the top (which is still inside out).  Stretch the elastic of the shorts and pin in place to fit the circumference of the top.  I like to start with the sides and then pin at halfway points in between.  The more you pin, the easier this will be.

Stretching the elastic while you sew, sew around the circumference of the top/shorts.  Turn everything inside out, and try it on to make sure it fits!  

Congratulations! Your romper is complete.  Feel free to comment if you have any questions or suggestions!